Today, I created my first repository at Github. The process was really simple. It basically involved the following steps :
After creating your account via http://github.com/account, you're presented with some information on how to continue
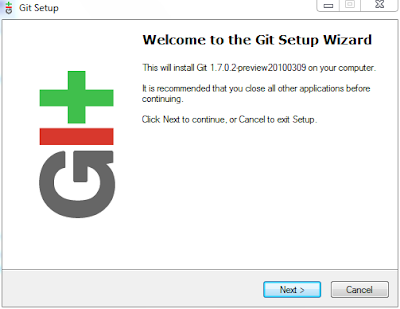
Installing git
Git is available on a large number of platforms. MsysGit provides windows based binaries for working with Git. On ubuntu, installing git is as simple as executing sudo apt-get install git-core
MsysGit comes with the necessary command-line tools to generate the key-pair we just mentioned. Linux/unix users should already these tools on their system.
The setup programs provides you with the necessary defaults to complete the installation in a next-next-finish kinda way.
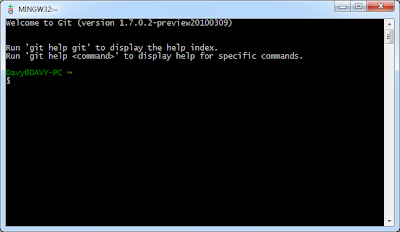
 Once Git is installed, it provides you with 3 programs :
Before we continue, as indicated by GitHub, and also outlined in the official Git tutorial, we'll need to configure our Git installation. This is done by executing the following commands in your Git shell.
We can now generate our public private key pair.
Generating the public-private key pair
An excellent guide on how this done be found here.
It basically involves executing the following command:
Installing the Eclipse plugin
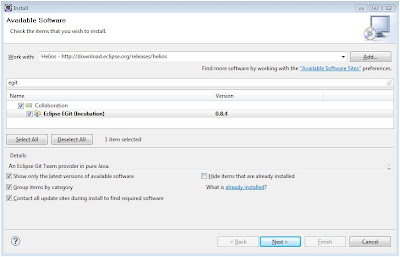
When using Eclipse as an IDE, you can use EGit (Eclipse Team provider for the Git version control system.)
EGit can be installed using the following download sites (Help - Install new software - Add repository)
After installing the EGit plugin, you'll get a new perspective allowing you to interact with your Git repositories.
Working with Egit
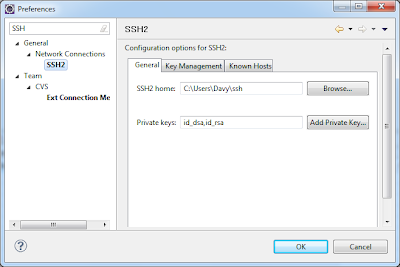
Configuring Eclipse SSH key management
Before we continue, we'll configure the SSH properties in Eclipse. Once your key-pair has been created, your private key will probably reside in the ".ssh" folder of your home directory.
Eclipse defines its SSH HOME to the %HOMEPATH%/ssh folder (without the 'dot'). We need to change this to point to the ".ssh" folder instead of the "ssh" folder.
Importing projects from Egit
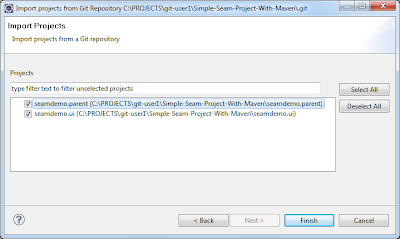
To import projects from GIT repositories, we'll use the "Import Projects From Git" wizard provided in Eclipse
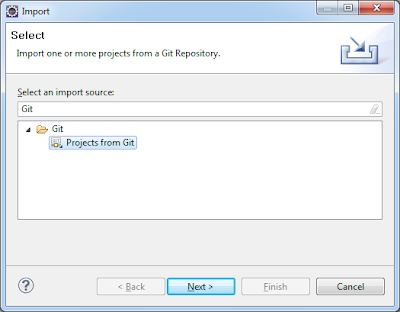
Using this wizard, we can either Clone or Add a repository. We'll clone the repository that is hosted on GitHub.

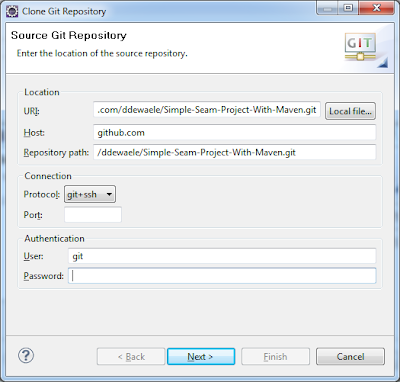
We need to provide the location of the GitHub repository in the URI section
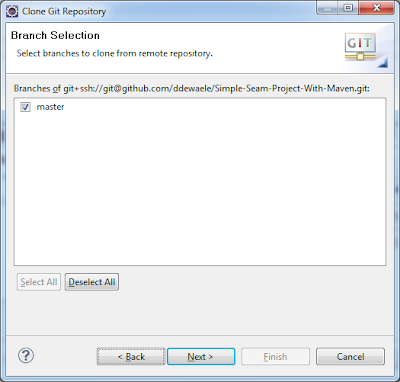
Once a connection is established, you need to select a branch from the repo. (In this particular case, we haven't created any branches yet, and only have the master branch available).
Next is selecting a destination for the cloned repository. Remember, when cloning a repository, you're effectively downloading an entire copy of that repository, so we need to select a local path here.

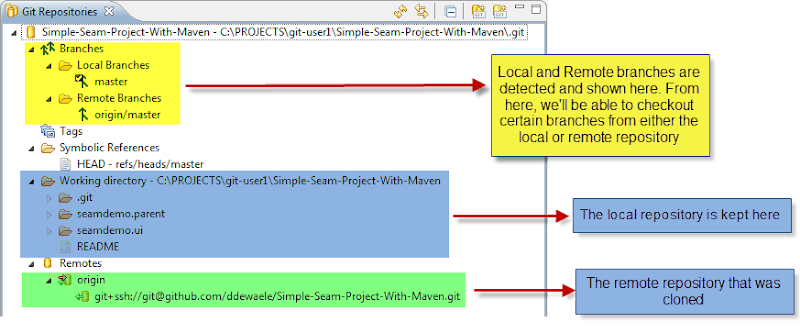
Once this is done, the repository will be added in the Git Repositories perspective :
Once you have your GIT repository setup using Eclipse, you can start checking out your projects.
Committing changes to the local using EGit
Committing changes through Eclipse is done via the Team Provider (EGit).
Right-click on your project, and select Team - Commit.
The following dialog screen will pop :
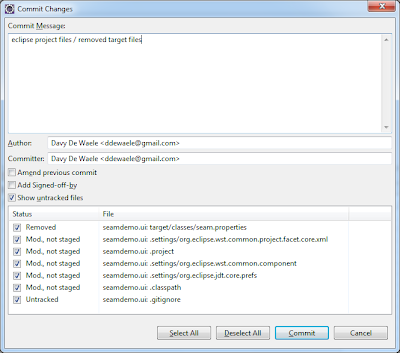
At the bottom, it provides you with an overview of files. It also allows you to provide a commit message.Keep in mind that these commits are done on your local GIT repository. If you want to ensure that other people get to see your changes, you'll need to push them to the remote GIT repository (located at GitHub).
Pushing changes to the remote repository using EGit
When working with EGit, we can commit changes against our local repository, but at some point we also want to push them to the remote repository.
If you want to push your changes to another repository (the one hosted on GitHub), you need to tell Egit where this repository is located. This is done using the following dialog that's popped when selecting Team - Push.
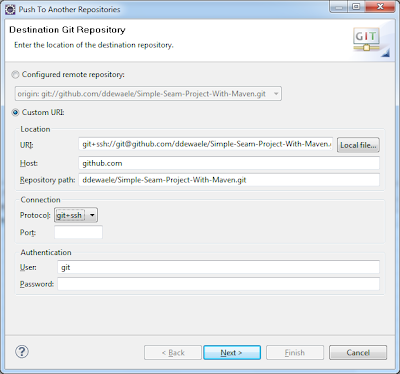
The EGit shows a pre-filled remote repository. The configured remote repository is coming from your local repository configuration.
When we initially cloned the remote repository using Egit, it created the following config file in your local repository
The correct URI can be found on the Github site. Login with your account and select the SSH url (providing read/write access). Enter that URL into the Custom URI location.
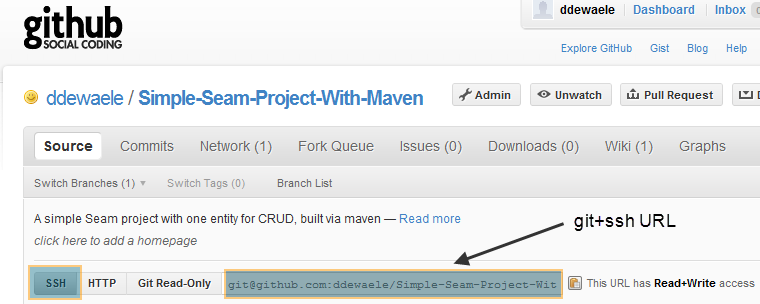
So the proposed URL in the dialog box :
git://github.com/ddewaele/Simple-Seam-Project-With-Maven.git
Needs to be changed to this :
git+ssh://git@github.com/ddewaele/Simple-Seam-Project-With-Maven.git
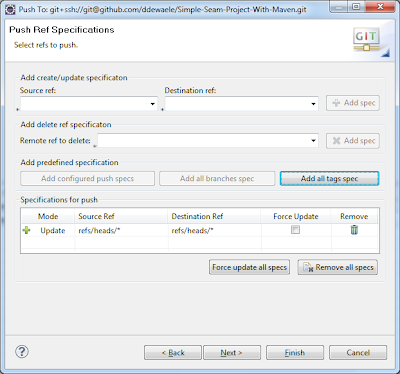
Next step is to add the specifications we want to push.
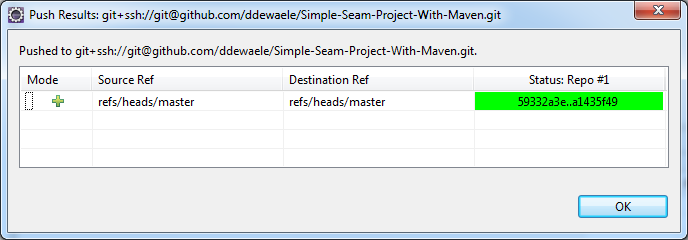
The next dialog shows you the expected push result. What we're seeing here is that the push from our Source Ref (refs/head/master) to the Destination Ref (refs/head/master) is OK.
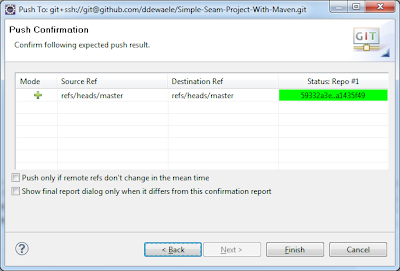
When clicking finish, we'll actually go ahead and push our changes to the remote GIT repository.
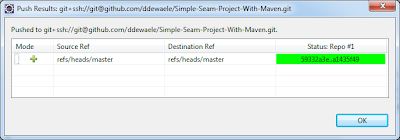
Verifying our pushed changes on the remote repository.
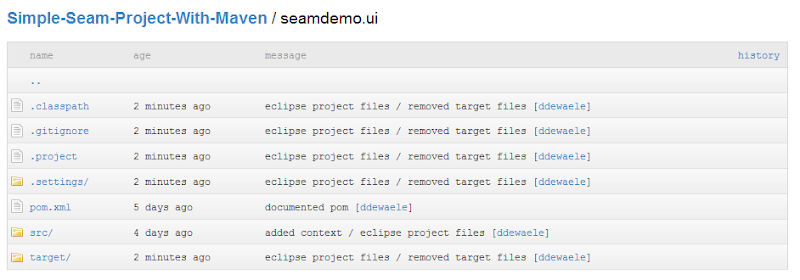
When looking at our remote repository at GitHub, we'll see our changes getting reflected there :
References :
- Signing up for a free account at Github and creating a repository
- Installing git (Windows users should checkout MsysGit.) to interact with the repository and GitHub.
- Generating the key-value pairs
- Creating a repository
- Installing the Eclipse plugin
After creating your account via http://github.com/account, you're presented with some information on how to continue
- with a new repository
- existing repository
Installing git
Git is available on a large number of platforms. MsysGit provides windows based binaries for working with Git. On ubuntu, installing git is as simple as executing sudo apt-get install git-core
MsysGit comes with the necessary command-line tools to generate the key-pair we just mentioned. Linux/unix users should already these tools on their system.
The setup programs provides you with the necessary defaults to complete the installation in a next-next-finish kinda way.

- Git Bash
- Git GUI
- Git Uninstall

Before we continue, as indicated by GitHub, and also outlined in the official Git tutorial, we'll need to configure our Git installation. This is done by executing the following commands in your Git shell.
git config --global user.name "Your Name"
git config --global user.email ddewaele@gmail.com
Add your public key
We can now generate our public private key pair.
Generating the public-private key pair
An excellent guide on how this done be found here.
It basically involves executing the following command:
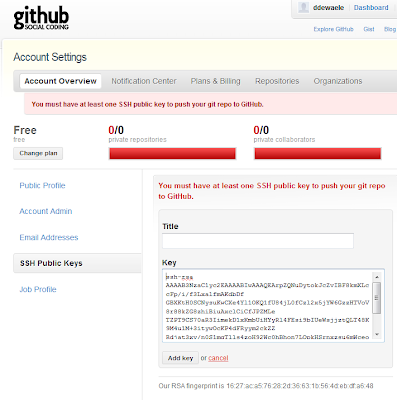
Davy@DAVY-PC ~
$ ssh-keygen -t rsa -C "ddewaele@gmail.com"
Generating public/private rsa key pair.
Enter file in which to save the key (/c/Users/Davy/.ssh/id_rsa):
Created directory '/c/Users/Davy/.ssh'.
Enter passphrase (empty for no passphrase):
Enter same passphrase again:
Your identification has been saved in /c/Users/Davy/.ssh/id_rsa.
Your public key has been saved in /c/Users/Davy/.ssh/id_rsa.pub.
The key fingerprint is:
69:e3:96:5a:2a:98:3e:59:6b:0b:06:13:4e:a2:9d:aa my@email.com
Once your keys have been generated, make sure to keep your provide key (id_rsa) in a safe place, and upload your public key (id_rsa.pub) to GitHub.

Installing the Eclipse plugin
When using Eclipse as an IDE, you can use EGit (Eclipse Team provider for the Git version control system.)
EGit can be installed using the following download sites (Help - Install new software - Add repository)
- Main Site: http://download.eclipse.org/egit/updates (Recommended)
- Helios Site: http://download.eclipse.org/releases/helios

After installing the EGit plugin, you'll get a new perspective allowing you to interact with your Git repositories.
Working with Egit
Configuring Eclipse SSH key management
Before we continue, we'll configure the SSH properties in Eclipse. Once your key-pair has been created, your private key will probably reside in the ".ssh" folder of your home directory.
Eclipse defines its SSH HOME to the %HOMEPATH%/ssh folder (without the 'dot'). We need to change this to point to the ".ssh" folder instead of the "ssh" folder.

Importing projects from Egit
To import projects from GIT repositories, we'll use the "Import Projects From Git" wizard provided in Eclipse

Using this wizard, we can either Clone or Add a repository. We'll clone the repository that is hosted on GitHub.

We need to provide the location of the GitHub repository in the URI section
- URI : The GitHub URL, as found on your GitHub project page
- Host : pre-filled, derived from the URI
- Repository path : pre-filled, derived from the URI
- Protocol : git + ssh
- Username : should be git (no password required)

Once a connection is established, you need to select a branch from the repo. (In this particular case, we haven't created any branches yet, and only have the master branch available).

Next is selecting a destination for the cloned repository. Remember, when cloning a repository, you're effectively downloading an entire copy of that repository, so we need to select a local path here.

Once this is done, the repository will be added in the Git Repositories perspective :

Once you have your GIT repository setup using Eclipse, you can start checking out your projects.

Committing changes to the local using EGit
Committing changes through Eclipse is done via the Team Provider (EGit).
Right-click on your project, and select Team - Commit.
The following dialog screen will pop :

At the bottom, it provides you with an overview of files. It also allows you to provide a commit message.Keep in mind that these commits are done on your local GIT repository. If you want to ensure that other people get to see your changes, you'll need to push them to the remote GIT repository (located at GitHub).
Pushing changes to the remote repository using EGit
When working with EGit, we can commit changes against our local repository, but at some point we also want to push them to the remote repository.
If you want to push your changes to another repository (the one hosted on GitHub), you need to tell Egit where this repository is located. This is done using the following dialog that's popped when selecting Team - Push.

The EGit shows a pre-filled remote repository. The configured remote repository is coming from your local repository configuration.
When we initially cloned the remote repository using Egit, it created the following config file in your local repository
[core]
repositoryformatversion = 0
filemode = true
logallrefupdates = true
autocrlf = false
bare = false
[remote "origin"]
url = git://github.com/ddewaele/Simple-Seam-Project-With-Maven.git
fetch = +refs/heads/*:refs/remotes/origin/*
[branch "master"]
remote = origin
merge = refs/heads/master
Unfortunately, the pre-filled remote url is not a valid URI so we need manually change it and select the Custom URI option.
The correct URI can be found on the Github site. Login with your account and select the SSH url (providing read/write access). Enter that URL into the Custom URI location.

So the proposed URL in the dialog box :
git://github.com/ddewaele/Simple-Seam-Project-With-Maven.git
Needs to be changed to this :
git+ssh://git@github.com/ddewaele/Simple-Seam-Project-With-Maven.git
Next step is to add the specifications we want to push.

The next dialog shows you the expected push result. What we're seeing here is that the push from our Source Ref (refs/head/master) to the Destination Ref (refs/head/master) is OK.

When clicking finish, we'll actually go ahead and push our changes to the remote GIT repository.
Verifying our pushed changes on the remote repository.
When looking at our remote repository at GitHub, we'll see our changes getting reflected there :

References :
- Pro Git Book
- Git Community Book
- Git User's Manual (for version 1.5.3 or newer)
- EGit/User Guide
- Github Homepage
- EGit Homepage
- MsysGit Homepage
Thanks for sharing this.
ReplyDeleteIts my first time to hear about this GIT.
I am just wondering, what kind of programming languages does it accept?
Angel
My blog : pont élévateur voiture